More progress on the 1948 Ford 8N this past weekend. Saturday I spent the morning at Acme in Sanford picking up some fasteners to replace the severely rusted ones I removed with Vise-Grips. After spending $6 on a bag full of stainless fasteners and some steel, I began assembling all the cleaned and painted parts. I mounted the new radiator, attached the dash plate and console. I attached the battery box and made a wood bottom to set the battery on. I may make a rubber one later but since I had a scrap piece of thin plywood almost already cut to size I decided that would work and I placed an old battery I had for the boat in there.
Saturday was also spent putting the starter back together. A few lessons learned: Make sure you press the bushing in far enough that it doesn't rub on the grooves in the starter shaft. Since my rear plate (think rear of tractor) had a crack I tried to press the bushing into the good half. I had to press it in more to make it clear those grooves to it ended up in about the middle. If you have the right sized bushing and your plate it not damaged you would press the bushing to the outside edge. After clearing that up we had one operational starter. Too bad the starter solenoid was bad so that would have to wait until Sunday.
I drained and replaced the oil with 20w50. I put in the new oil filter. I drained and added the 90w Mineral Oil I purchased from NAPA to the transmission. I installed the radiator and hoses (putting a thin coat of Teflon pipe compound to keep them from rusting more) an used some new all stainless pipe clamps. I filled the radiator with Anti-freeze and distilled water.
We attached a temporary tank to the dash and hooked up the fuel line. My dad and I hot-wired the starter and cranked it up. We ran it much longer than last time so it had a chance to warm up. The flat head 4 cylinder has a unique sound to it especially when there is no exhaust pipe.
Sunday I attached the air cleaner, attached the new starter solenoid from a 1970's ford. I think the original should be a 3 pole but mine is a 4 pole. I will add another page talking about wiring the tractor later. We wired in the new key ignition and the push button. Once everything was ready we attached the temporary gas tank again and started it up. This was the first chance I had to drive it so it was time for a road test.
We first adjusted the carburetor now that it had an air cleaner to give proper airflow resistance. I may also add another page talking about carb adjustment later. I put it in gear and pulled out of the shop. Under load it sputtered a lot so we continued with adjustments. Eventually it ran pretty good. I tried all the gears and pulled it up the hill. I will say that 4th gear really moves compared to the others. It is definitely a "get home for supper" gear. It did smoke once it got warmed up and the oil got thin. I will probably first try some Seafoam as I have read a few posts saying in some cases it works to help clean and free sticky rings. I will also check compression to see if any of the cylinders are real bad.
That's it for now. Next I need to work on fixing the front fenders to support my hood. So stay tuned...
Monday, August 22, 2011
Monday, August 15, 2011
Painting Gone Bad...
This weekend was a busy weekend for the 1948 Ford 8N, tons of prep and painting. All of my parts arrived, one large box at a time. The hood was here early and the grill, radiator and rest followed. During the week I picked up some paint from a local paint shop. I purchased an epoxy primer and I believe a polyester 2 part gray for the hood. Since I had already exceeded my budget the red paint I chose is a much lower quality than the gray. Because of that I decided to paint the gas tank in the gray. Saturday I finished some body work and prepped all the surfaces for priming. Saturday afternoon I shot some primer on the hood, grill, gas tank, and spot primed the radiator. The rain held out despite some dark clouds but the humidity was a little high.
Sunday was different. We rolled out the tractor and I cleaned basically the clutch housing and all the surfaces I will be covering up with parts (battery box and dash) and applied some phosphoric acid to all the rusted surfaces. I also readied the fan and radiator mounts since they were accessible. Then I mixed the good paint. I have never sprayed a high quality paint so I will admit there was a learning curve. I sprayed the inside of the hood (very heavy along the bottom rail since it was not easy to hit). One side of the gas tank looked great as did one side of the grill. Then on to the top of the hood since some dark clouds were rolling in (which were not there 10 mins ago). I hustled on the hood and payed the price. Two runs and one was right on the top ridge. I knew I needed to hurry so I rolled it flat knowing it would probably leave marks on the bottom rails. I sprayed the rest of the top and as I made the final 2 passes drops began to fall from the sky. In the coming weeks I will be wet sanding and applying a second coat to the hood since mother nature needed to sprinkle for a few minutes.
After the rain cleared the sun came back out and so I primed the tractor body section and a few other parts. Let that dry for about 15-30 mins per the instructions and then sprayed the red. The fenders even got a coat of primer since I overshot the mix by a few ounces.

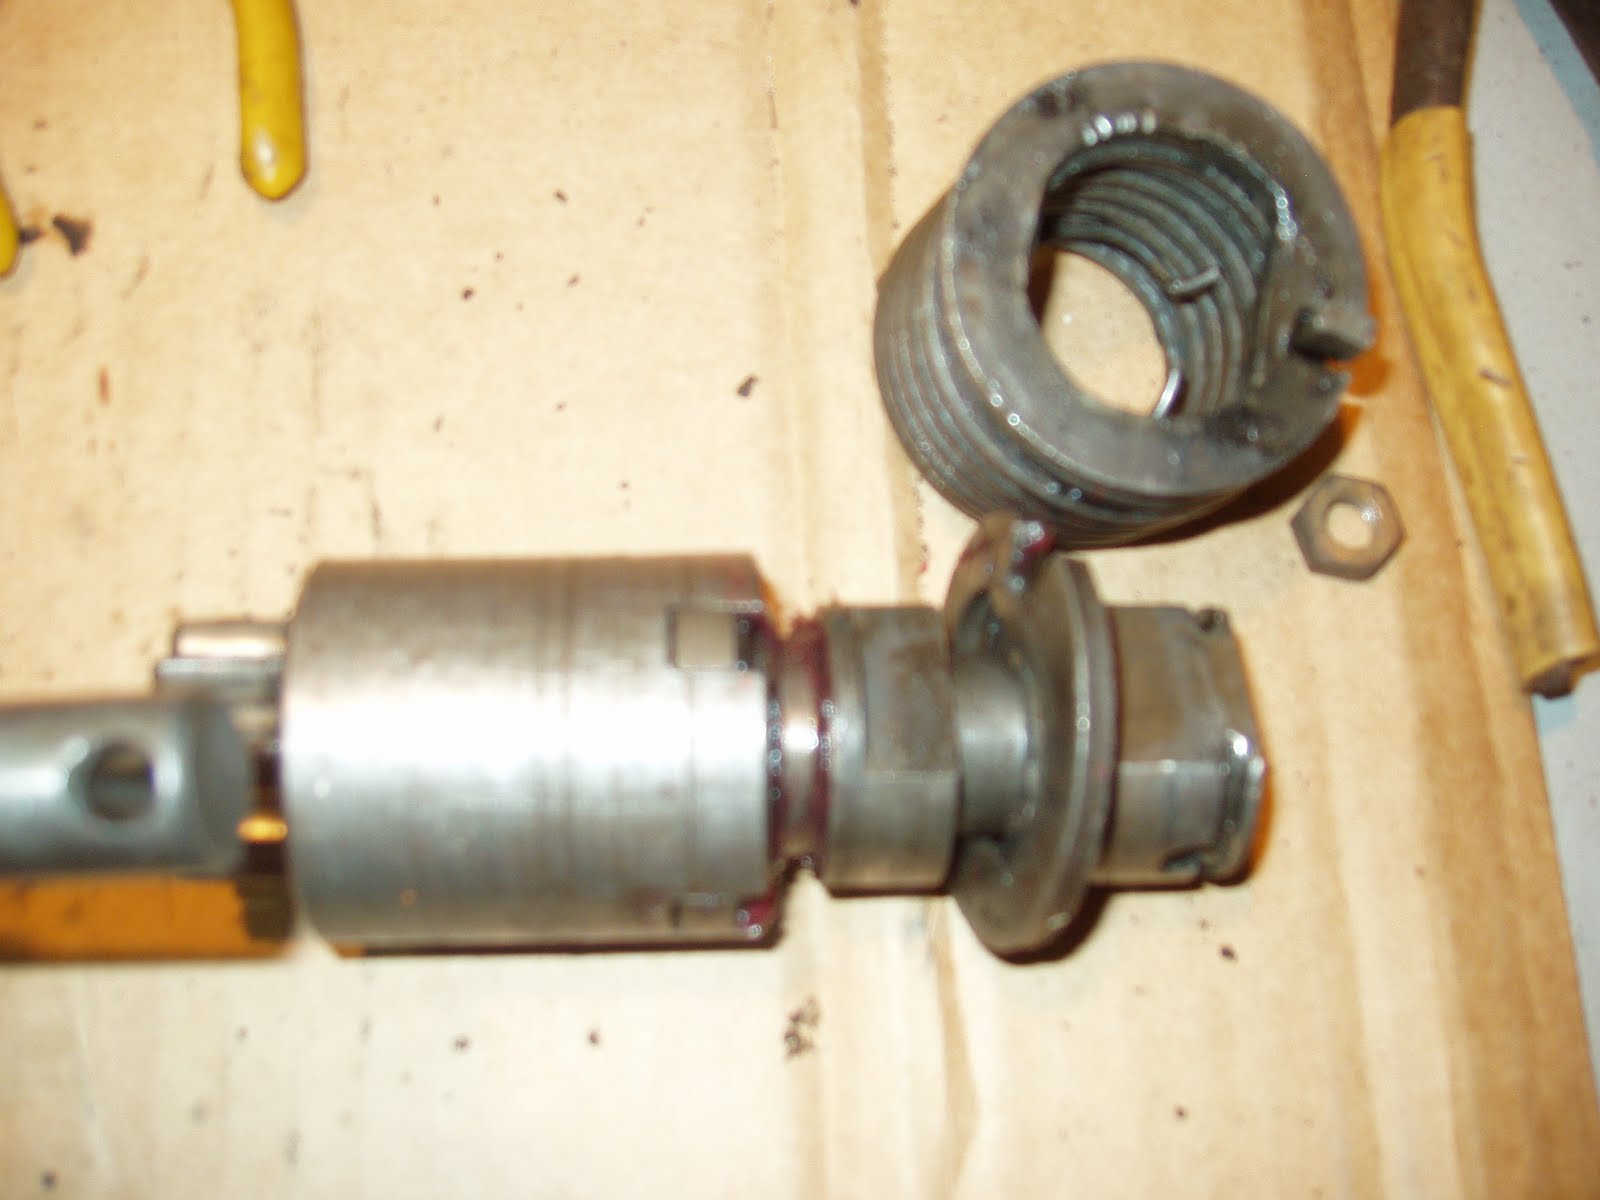
I also took apart the starter and found that the brushes were hardly worn. The bushing was not in the front plate and I suspect that it was the reason for the locked up condition when we brought the tractor home (pinned in the flywheel). I am heading to a bearing shop this week to see if I can pick up a new one to press in while I have it torn apart. Some new grease and hopefully next weekend we can start putting things back on.


Sunday was different. We rolled out the tractor and I cleaned basically the clutch housing and all the surfaces I will be covering up with parts (battery box and dash) and applied some phosphoric acid to all the rusted surfaces. I also readied the fan and radiator mounts since they were accessible. Then I mixed the good paint. I have never sprayed a high quality paint so I will admit there was a learning curve. I sprayed the inside of the hood (very heavy along the bottom rail since it was not easy to hit). One side of the gas tank looked great as did one side of the grill. Then on to the top of the hood since some dark clouds were rolling in (which were not there 10 mins ago). I hustled on the hood and payed the price. Two runs and one was right on the top ridge. I knew I needed to hurry so I rolled it flat knowing it would probably leave marks on the bottom rails. I sprayed the rest of the top and as I made the final 2 passes drops began to fall from the sky. In the coming weeks I will be wet sanding and applying a second coat to the hood since mother nature needed to sprinkle for a few minutes.
After the rain cleared the sun came back out and so I primed the tractor body section and a few other parts. Let that dry for about 15-30 mins per the instructions and then sprayed the red. The fenders even got a coat of primer since I overshot the mix by a few ounces.
 |
 |
| Aftermarket Hood |

 |
| Ford 8N Dash |
 |
| Ford 8N Seat |


Wednesday, August 3, 2011
Ordering Parts...
So I ordered some parts last night and I should be heading to Apopka, FL today to pickup and order a few more.
I ordered a radiator and hoses, hood and starter rebuild kit from http://www.ytmag.com/parts/
I am heading to pick up the rest of the parts I need from http://www.dmtractorparts.com/
This weekend I will probably get into some bodywork, cleaning and painting. I just wanted to post those links for anyone shopping for 8n Parts.
Subscribe to:
Posts (Atom)